Cubase
- Integration: through the BRIDGE app of GoorooLink (macOS), using MMC and MTC.
- Features: song list from an exported marker file, setlists, transport, redundancy.
- Needed: GoorooLink running, the Cubase configuration below, and the marker file loaded in GoorooLink whenever the markers change.
GoorooLink BRIDGE
Cubase cannot be scripted like Ableton, Bitwig or Reaper, so the LIOBOX² works with it through the BRIDGE app of GoorooLink. The BRIDGE relays the commands sent by the LIOBOX² and gives the LIOBOX² the Cubase information (marker list, playhead position, …).
GoorooLink runs on macOS only. If it is not installed yet, see Install GoorooLink.
-
Launch GoorooLink and open APP → BRIDGE.
-
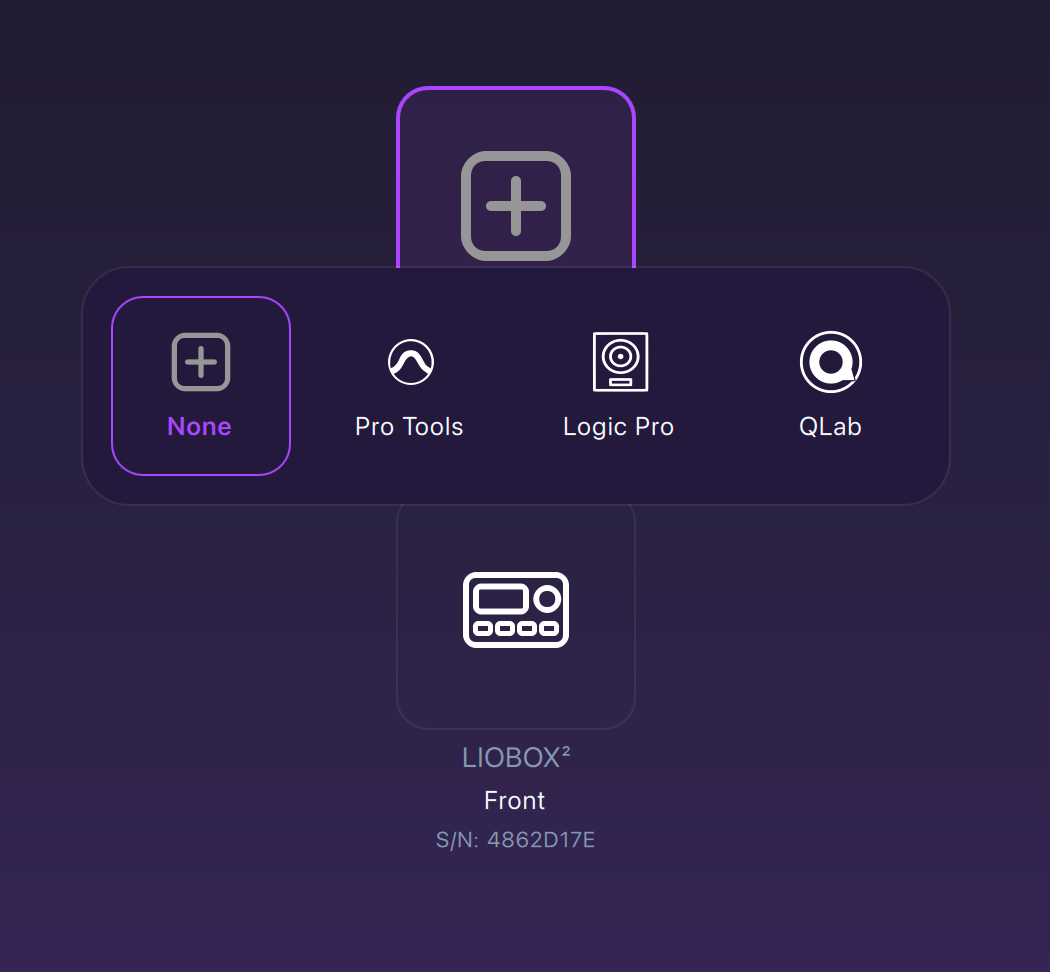
In the DAW selection, click the DAW tile and choose Cubase.
-
In the LIOBOX selection, choose your connected LIOBOX².
-
Check the BRIDGE state next to the APP → BRIDGE menu item: it turns green once both the DAW and the LIOBOX² are detected.
GoorooLink must be running for the BRIDGE to work. It can run in the foreground or in the background, but it must not be exited.
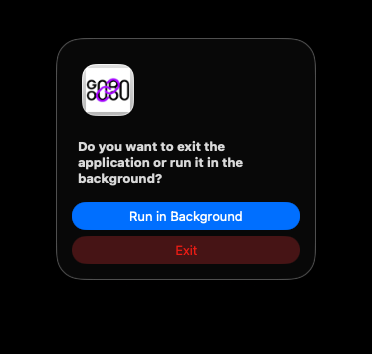
To run it in the background, quit the application: a dialog asks whether it should run in the background or exit.
Cubase configuration
This section covers the Cubase configuration. Make sure Cubase is selected in the BRIDGE of GoorooLink.
-
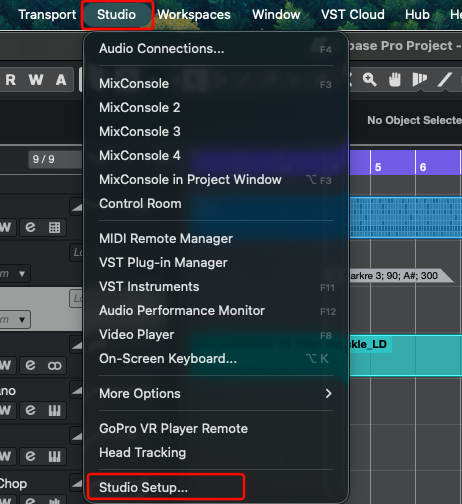
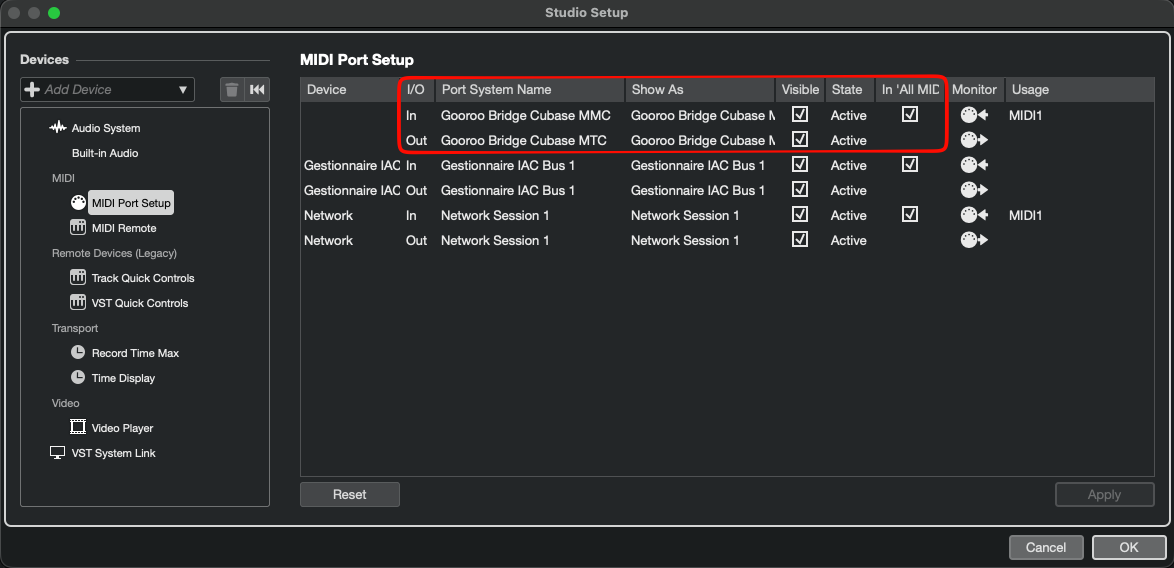
Check that the Gooroo Bridge MIDI devices are visible and active in Studio → Studio Setup.
-
In Transport → Project Synchronization Setup, open the Machine Control tab and configure the MMC input: enable MMC Slave Active, set the MIDI Input to Gooroo Bridge Cubase MMC and the MMC Device ID to 127.
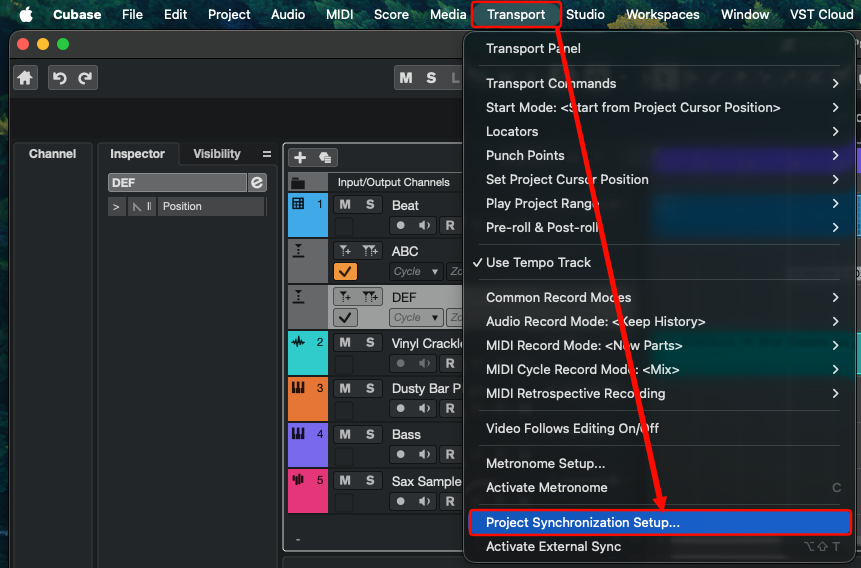
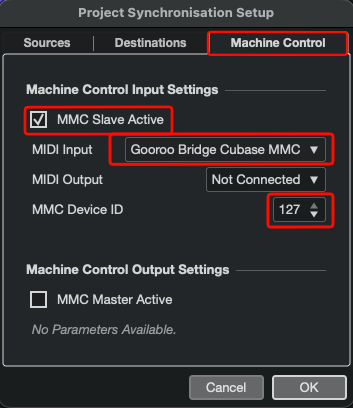
-
Configure the MTC output: in the Destinations tab, tick Gooroo Bridge Cubase MTC under MIDI Timecode Destinations.
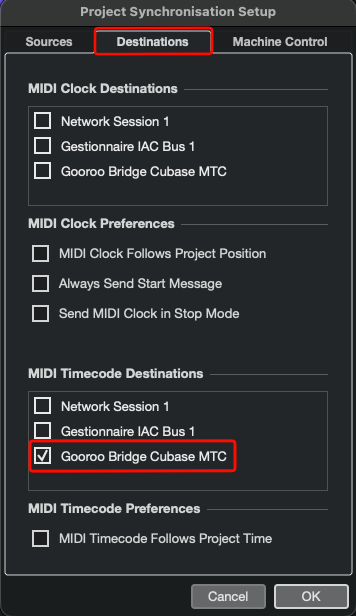
-
In the Sources tab, set the Timecode Source to Internal Timecode.
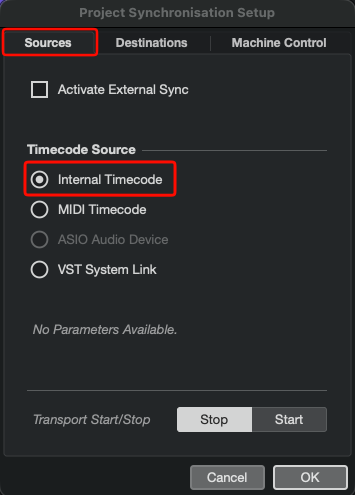
Cubase is ready to be used!
Retrieve the marker list
Cubase does not provide an API to read its marker list, so you have to provide the list yourself. To keep this simple, the BRIDGE app reads the markers from an exported file: you only need to give it that file.
If the marker list changes or if a marker position changes, this process must be redone.
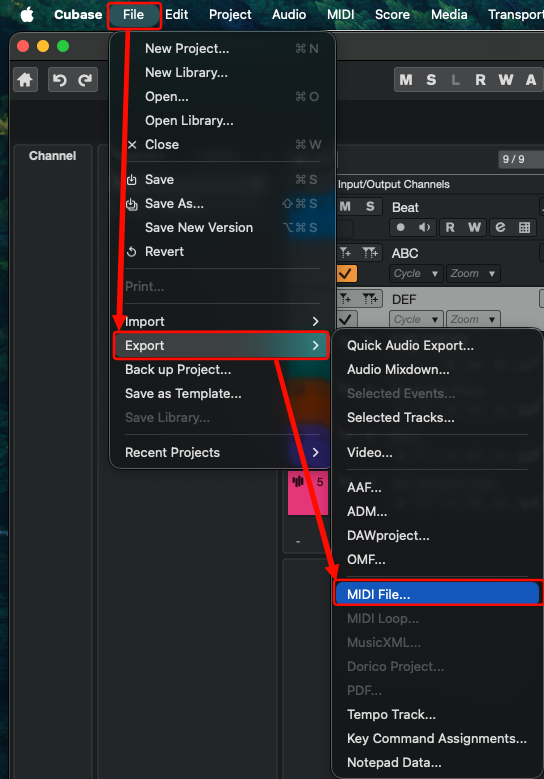
Option A: export the Cubase MIDI file (.mid)
-
Export by going to Cubase File → Export → MIDI File…
-
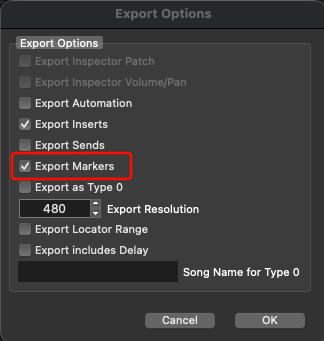
Make sure Export Markers is selected.
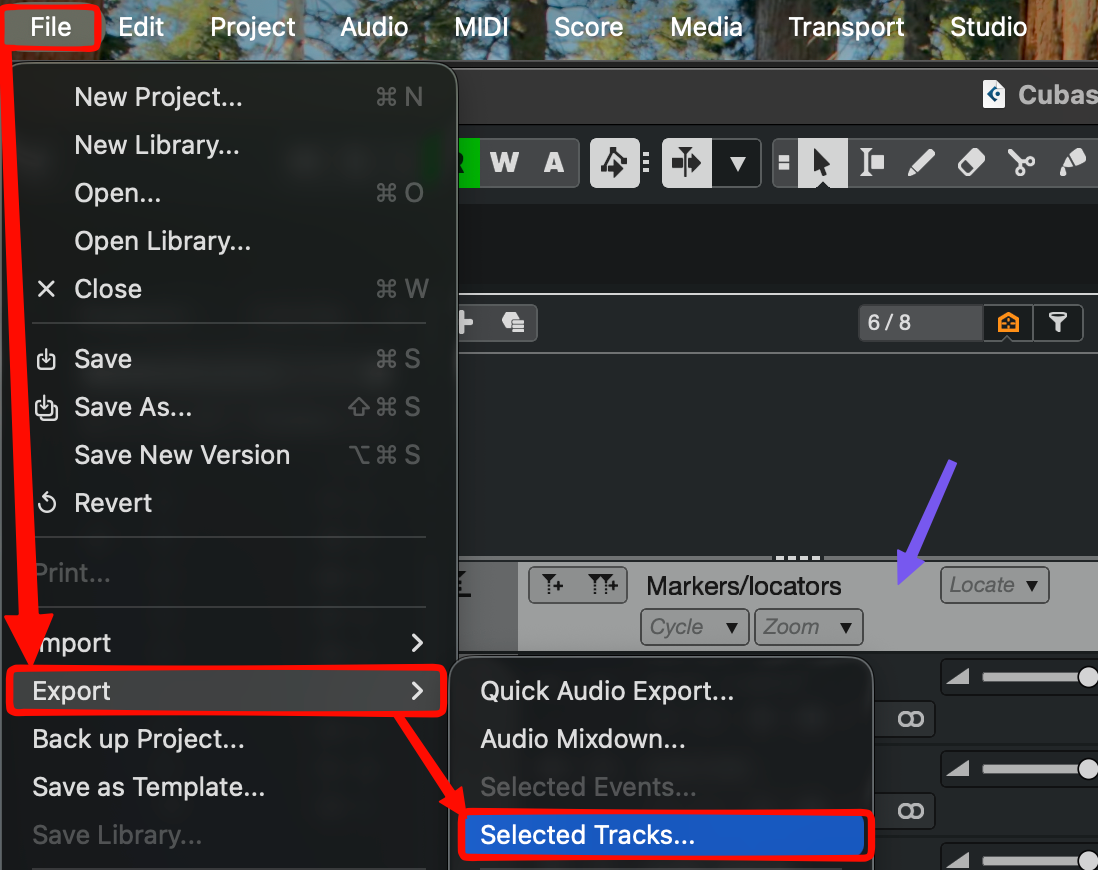
Option B: export the Cubase Selected Tracks file (.xml)
-
Select the marker track to export.
-
Export by going to Cubase File → Export → Selected Tracks…
Import the MIDI or XML file in GoorooLink
-
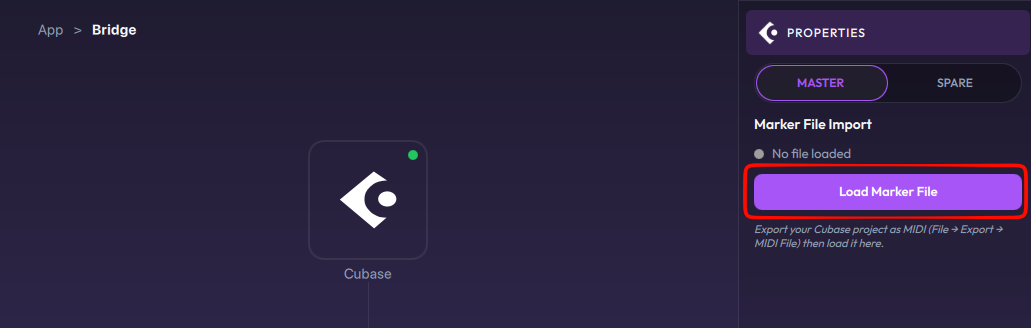
Load the exported marker file with Load Marker File:
-
The marker list is imported automatically and displayed. The LIOBOX² can now use this marker list.
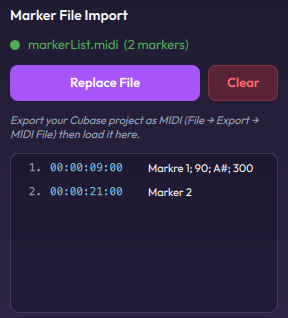
To replace the list later, use Replace File; to remove it, use Clear (see Cubase properties).
Cubase properties in GoorooLink
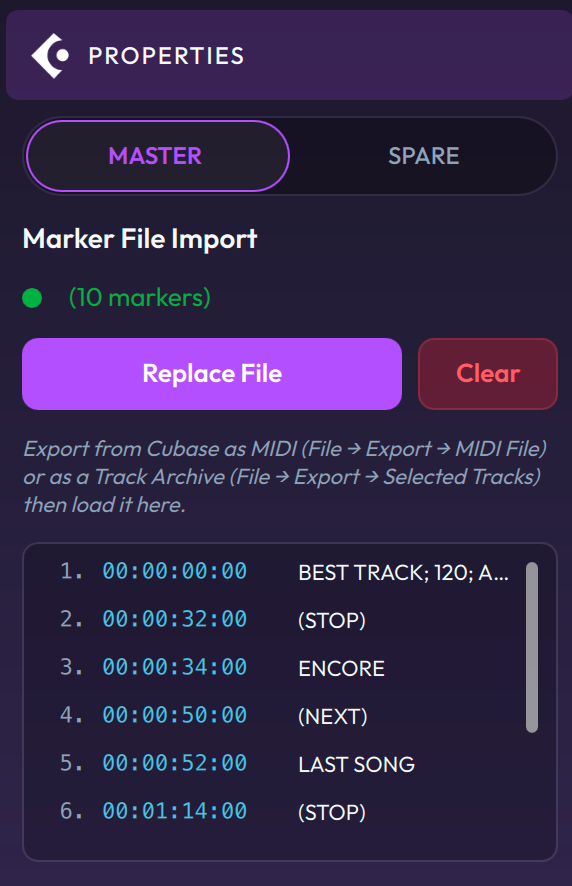
- Master / Spare: select to assign the connected LIOBOX² as Master or as a Spare. Prefer using the Spare assignment when actively using redundancy.
- Marker File Import: displays the loaded file and the number of markers read. If no file is displayed but markers are loaded, the markers come from a previous GoorooLink session (cached information).
- Replace File: loads a marker file, either from a Cubase-exported MIDI file (
.mid) or from a Cubase-exported Selected Tracks file (.xml). - Clear: clears the marker list and the loaded file path.
LIOBOX² modes
Select the CUBASE mode in MENU → MODE.
All tracks mode
Switch to ALL TRACKS mode from the Mode menu.
| Ableton | Reaper |
|---|---|
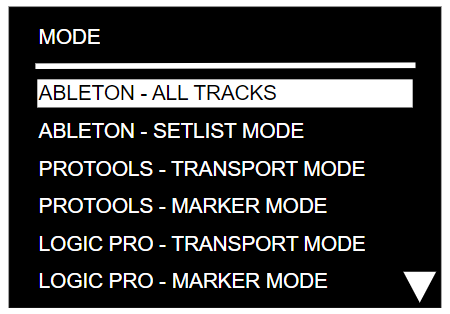 | 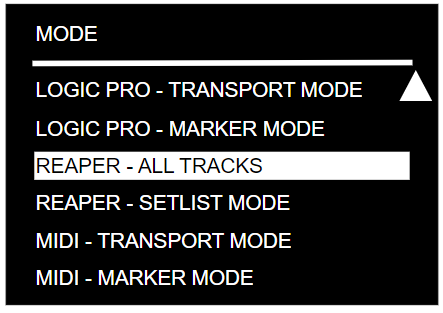 |
ALL TRACKS mode gives access to all the songs of the DAW session, in session order, so you can move to and launch any song of your set.
If Error on duplicate track is enabled, the LIOBOX² checks the song names and warns you when two songs (scenes/locators) have the same name, so you can correct them.
Setlist mode
SETLIST mode lets you choose and reorder the songs: the LIOBOX² only displays the songs of the show's setlist, in the order you want. All this without modifying the DAW session or touching the computer.
Setlists can be renamed and are saved in the internal memory of the LIOBOX².
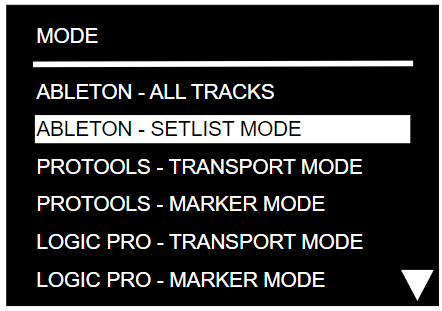
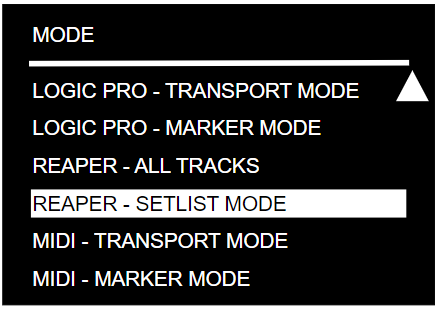
Switch to Setlist mode from the Mode menu:
| Ableton | Reaper |
|---|---|
 |  |
Setlist creation
To create a setlist, select + ADD [MODE] SETLIST in MENU → SETLIST. First select the mode (Cubase) in MENU → MODE.
The first letter of the mode (A/B for Ableton/Bitwig, R for Reaper, …) is added at the start of the setlist name, to show which mode it belongs to.
As songs are added, the total duration is displayed at the top of the window, next to the setlist name.

Add songs to the setlist
Once the setlist is created, you can add songs. The song list is loaded directly from the active Cubase project.
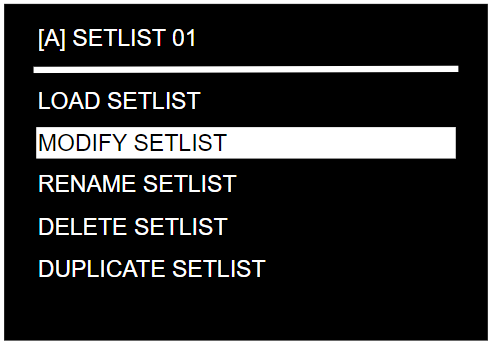
To add a song, open the setlist, select MODIFY, then + ADD TRACK. The list of loaded songs appears: click a song to add it. The same song can be added several times.
The duration of each song is shown next to its name (it comes from the song title, see the naming convention).
| Setlist menu | Setlist / MODIFY menu | ADD TRACK menu | Setlist / MODIFY menu |
|---|---|---|---|
 |  | 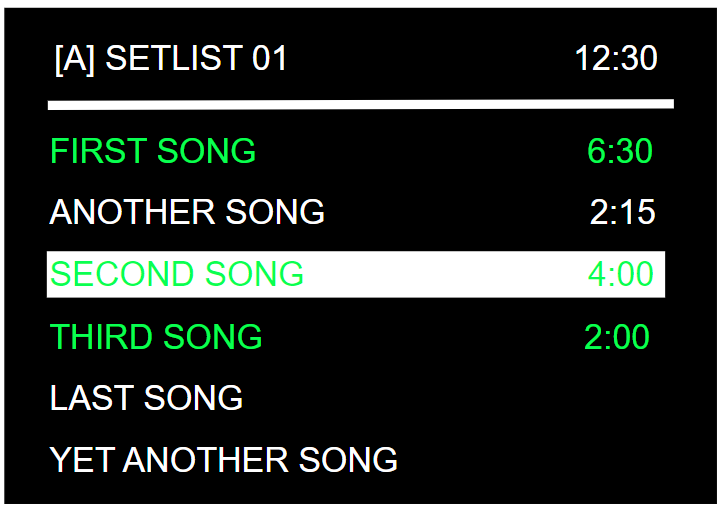 | 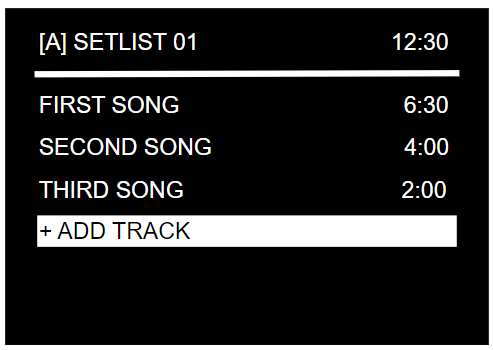 |
Songs already in the setlist appear in green.
Manage and load setlists
A setlist can be renamed (12 characters maximum), duplicated and modified at any time. See Setlists.
If a song in the loaded setlist is not present in the DAW session, it is displayed in red on the Play screen. Up to 9 setlists can be created.
To use a setlist, select SETLIST mode in the MODE menu and load the setlist.
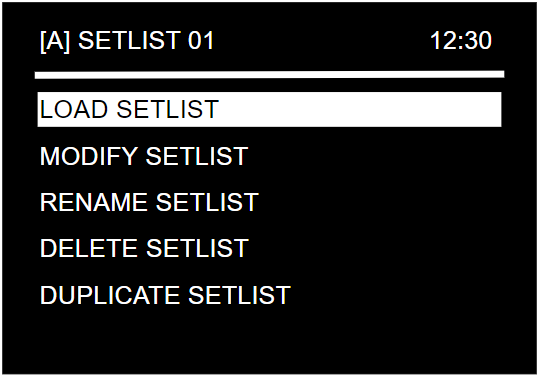
The setlist name appears in red on the Play screen if the loaded setlist's mode is different from the active mode.
Track position in session/setlist
The position of the current song in the session or setlist is constantly displayed at the top of the screen.
Track naming convention
The LIOBOX² can display the BPM, key and duration of each song. Enter them in the song name using this naming convention:
song_name ; bpm ; key ; duration
- Write the duration as
mm:ss. - If you do not need a value, leave the field empty and omit the
;. - To keep a song from being sent to the LIOBOX², start its name with
(). Example:()song number 1.

Compatible characters
The following characters are compatible with the LIOBOX². Any other character is filtered out.
- Upper case:
AtoZ - Numbers:
0to9 - Parentheses:
( ) - Square brackets:
[ ] - Hashtag:
# - Ampersand:
& - Plus:
+ - Slash:
/ - Space
Names that are not transmitted
A name starting with one of the following is not transmitted to the LIOBOX²:
()[](LOOP_**>>>+LOOP
The following marker names are also filtered out from the marker list received by the LIOBOX²:
AUTOSTOP(STOP)(NEXT)STOPSONG ENDPLAYNEXTSTOPBOTEASY LOOPERNEXTCUE
Pad features
Pads can be reassigned from MENU → PAD CONFIG (see Pad config). In Cubase mode, the following features are available:
- NONE
- PLAY LIOBOX MARKER
- PLAY (TRANSPORT)
- PAUSE
- STOP
- PREV LIOBOX MARKER
- PREV MARKER (TRANSPORT)
- FAST-REWIND
- RESTART MARKER
- NEXT LIOBOX MARKER
- NEXT MARKER (TRANSPORT)
- FAST-FORWARD
- LOOP IN/OUT, LOOP IN, LOOP OUT, LOOP ON/OFF, LOOP CREATE X
- CUSTOM MIDI
Notes:
- Play or Play (Transport) corresponds to the DAW Play.
- Play LIOBOX Marker plays the next song.
- Fast-Rewind and Fast-Forward can only be assigned to the Long press pad event.
- Next or Prev Marker (Transport) corresponds to the DAW Next event (next/previous in the project).
- Next or Prev LIOBOX Marker selects the next or previous marker from the setlist.
- The loop features are described in Loop on-the-fly.
Cubase shares its pad memory with Logic Pro: a pad assignment made in one mode also modifies the assignment in the other.
Redundancy
In the BRIDGE Cubase properties of the second computer, assign the LIOBOX² as Spare. The LIOBOX² compares the song lists of the Main and Spare computers to ensure that the sessions are identical. See Redundancy.
Troubleshooting
- Markers outdated or missing: export and load the marker file again.
- For the green check icon and song names, see Troubleshooting.